

Laminate flooring is a great cost-effective choice if you want to add value to your home and change the look of your rooms. In this 2021 step-by-step guide on how to lay laminate flooring, we’re going to touch on the most important points:
- a comprehensive list of all the tools and materials that you’ll need before you start laminate flooring installation
- tips on how to acclimate the laminate flooring to your house
- subfloor preparation (test moisture, levelness)
- an in-depth, step-by-step guide to laying laminate flooring
So, shall we start on how to install laminate flooring?
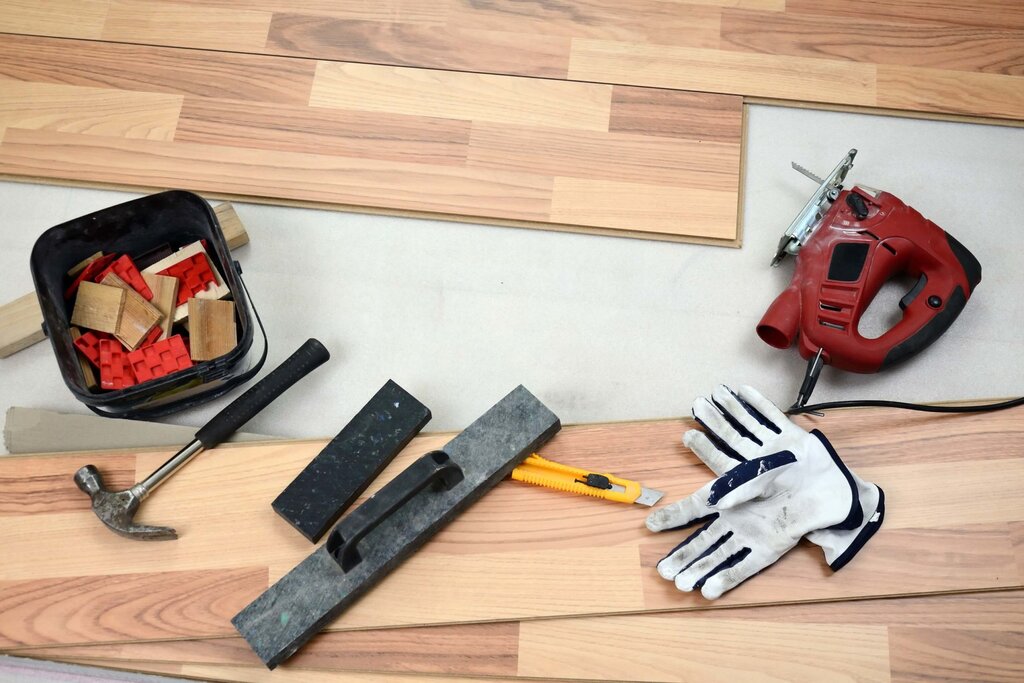
How To Lay Laminate Flooring: Tools & Essentials
Laminate flooring installation is not rocket science. You will see how to lay laminate, and it will go like a breeze. The first step is to ensure you have all the right tools before you start. This will save you time and any frustrations as you proceed. So, make sure all these tools and materials are on your checklist:
- A scraper for subfloor preparation before you lay laminate flooring
- A solid bar to remove any pack strips in case you have a carpet
- A beating block to ensure good positioning of the laminate flooring
- A rubber mallet
- A crowbar
- It’s nice to have an oscillating tool (or jam saw) for cutting anything that you need to slide your laminate under
- Knee pads, safety glasses and a dust mask would be nice (yeah, so, don’t try to do this without knee pads; it will become a very miserable job)
- pencil and measure tape
- electric saw
So, check all of these off your list, and let’s move along on how to lay laminate flooring.
Tips on How to Prepare Laying Laminate Flooring
Ok, so, you’ve got all those tools and materials on the list, now it’s time for some further preparations.
First, you need to acclimate the laminate floorboards in your home. Let them stay at least two days in the space where you’ll actually install them. Crisscross them on the floor and let them get used to the airflow and humidity of your space. Poor acclimation is also one of the causes of buckled wood floors. So, to avoid any future frustrations, just let the laminate flooring get used to the environment.
Secondly, before you lay laminate flooring, double-check the humidity of your subfloor, especially if you’re installing laminate flooring in a new home. The humidity level should be below 14%.
After you’ve taken any carpet out and cleaned the room where you want to lay laminate flooring, next make sure that you cut all the areas where you need to slide the laminate floorboards under, like a door casing. So, take a small spare piece of the floor for reference, and cut the area with an oscillating tool.
You also need to be sure that the subfloor is level. If it isn’t it can cause unnecessary stress and damage to your new flooring. You can do this using standard or laser level. It is a key component to a complete guide on how to lay laminate flooring
If you have a concrete subfloor it is important to prevent moisture. The perfect solution is to use a moisture barrier.
Step by Step Installation
So now that you’ve got all the tools, checked the humidity and level of your subfloor and acclimated the laminate flooring, it is time to actually install your new floor. Follow our how to lay laminate wood flooring step-by-step guide!
Step 1 – How to lay laminate underlay
The first step is to lay a moisture barrier – make sure that it overlaps and is held together using tape. Depending on your floor choice you may need to install an underpad or sound barrier.
Step 2 – Inspect the laminate planks one more time
Tip: It is always a good idea to order 10% more laminate flooring than your space requires. During installation, you can get damaged boards and waste. Moreover, it would be nice to have some spare parts for future repairs.
Step 3 – How to cut laminate flooring
You can cut laminate flooring with a couple of tools – a handsaw, a jigsaw, a crosscut saw or a table saw.
So, if you’re going to do it with a handsaw, just make a small cut first, and then saw on that. If you need to cut out certain shapes from a laminate board, then the jigsaw is ideal. Use a fine tooth blade and have the saw blade rolling before you touch the board.
Step 4 – Read the Manufacturer’s Instructions for The Click System
The way the boards come together might differ from one laminate flooring to the other. So, before you lay laminate flooring, make sure you read the instructions right. Next, ensure that your expansion gaps spacers are in place along with the first board. Lay the first board groove side facing the room.
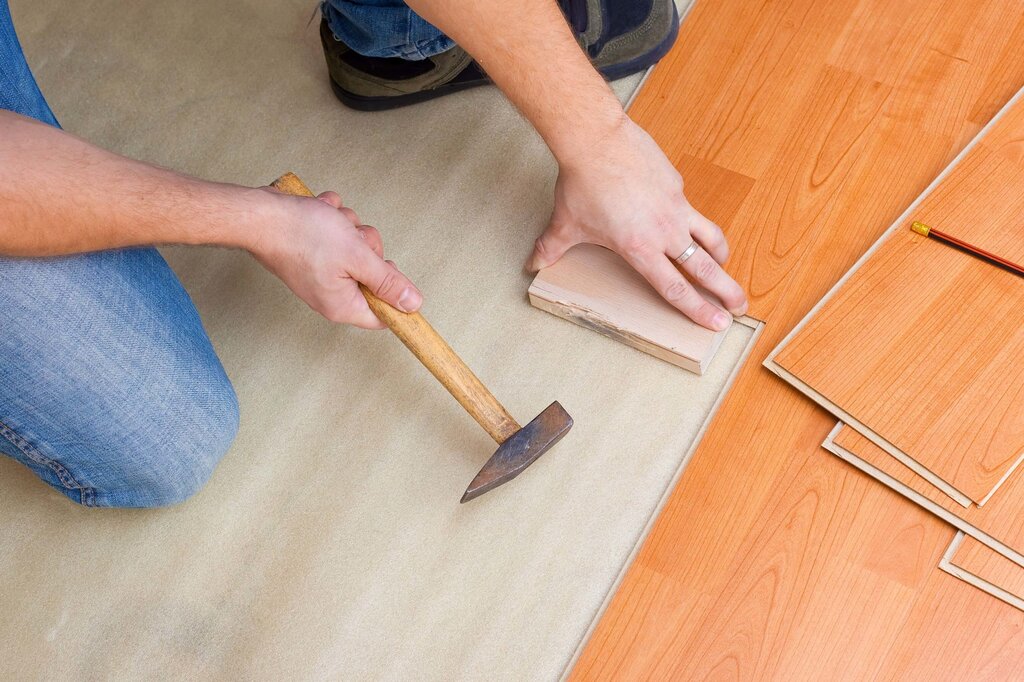
Step 5 – Begin clicking the floor together
Start from a straight wall. Lay laminate flooring on your first row and join the edge boards together. Ensure you leave a 10mm gap against the wall; you can use spacers for this.
If you notice small gaps appearing along the first rows, it means the boards are not completely aligned. You need to fix that at the beginning to avoid any future nuisance. So, use a tapping/beating block to tap the boards closed and make sure there are no gaps remaining.
So, this is pretty much how you lay laminate flooring. It is important that you pay attention to all the details, and that you also take care of yourself, your comfort (don’t forget about those knee caps!). Make the best of your home.

For further advice on how to lay laminate flooring in the UK, or about the best wood flooring for your home feel free to contact the ESB sales team. Contact us now come down to our North London showroom for a closer look.


.svg)
| Mon-Fri | 8:00AM – 5:00PM |
| Saturday | 10:00AM – 4:00PM |
| Sunday | 11:00AM – 3:00PM |
.svg)