

Floating floor is a method of installing a floor rather than a specific type of flooring material. In this method, the individual boards or planks attach to each other – either by means of gluing or snapping together – but the wood is not secured directly onto the sub-floor or underlay. Here we are going to present basic installation steps for installing your hardwood floor using the floating method.
1. Flatness Of The Floor
The first thing you should check is the flatness of your sub-floor. Slight slopes are acceptable as long as the surface is flat and should not affect your installation.
2. Tools Needed For Floating Installation
You will need some basic tools to install your new floor:
•Tapping block
• Hammer
• Spacers
• Glue
• Utility knife
• Painters tape
You will also need a table saw to cut the wood. As you start the first thing you have to do is to take a piece of underlay and a piece of your flooring and undercut your door jambs so the floor can easily fit, for a clean professional look. Make sure that you remove any loose pieces of debris.
3. Underlayment For Your Floating Floor
Now you are ready to unroll your underlay and get set up to install your floor. The underlay cushions the floor and help to muffle sound. Start to unroll the underlay in the same direction as the hardwood planks will go. Be sure that you trim off any excess underlay using your utility knife.
4. Installing Your Floor
Pick your starting point and work from left to right with the tongue side of the boards facing the wall. Insert your spacers so you can maintain expansion gaps as you install the floor.
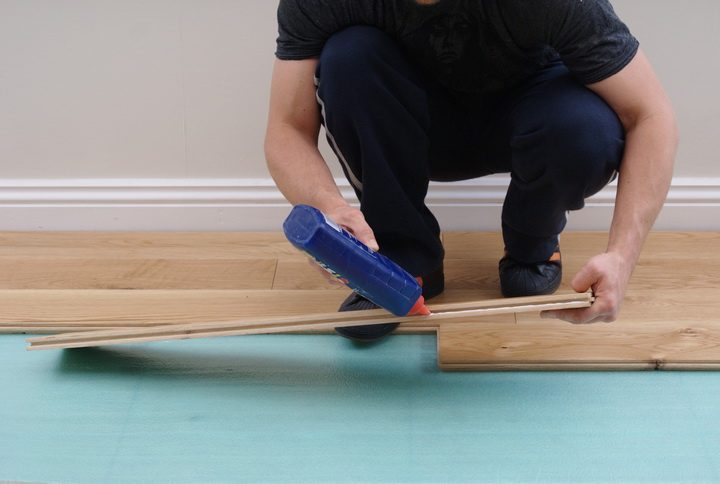
Apply glue to the groove part of each board on both the length and the end joints. Now you are ready to install the first board of the second row into the first board of the first row. It should fit into place very easily. We have created a great post about installing tongue and groove floors.
As you installing the rows use the painters tape to keep the floor from moving around while you are waiting for the glue to cure. Do not use standard masking tape as it can affect the finish of your floor. It is really important that as you work your way across the room with your next rows that the previous rows don’t shift.
Now after the first three rows are in place, you should wait around 30 minutes to give the glue some time to set up and cure little bit.
Remember – as you continue to work your way across the room, work from the left to right and continue to use your painter’s tape.
5. Installing The Last Board
To cut the last row place the board to be cut directly on top of the previous row of boards installed. On top of that place another plank, which must be moved against the wall. Draw a line on the middle plank. This will be the cutting line. When installing those few last boards you not going to have room to use your tapping block so simply use the pull bar to get a tight fit in the last row.
Now all you have to do is to remove spacers, reinstall the scotia or beading and clean up.


.svg)
| Mon-Fri | 8:00AM – 5:00PM |
| Saturday | 10:00AM – 4:00PM |
| Sunday | 11:00AM – 3:00PM |
.svg)