

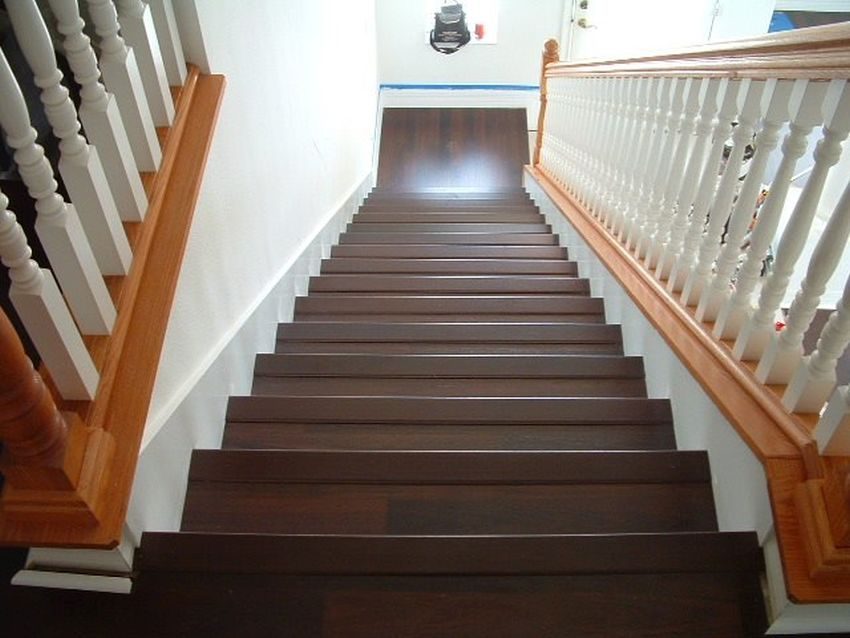
Laminate flooring is probably among the most universal floor coverings which can be used at flats or houses. It has this significant advantage over other flooring systems that it is quite easy to install, above all in the case where the floor has already been prepared. However, as is the case with all flooring systems in general, laminate flooring installation entails some specific problems – for instance, when laying this material on stairs! Nevertheless, you shouldn’t be discouraged from installing laminate flooring as a DIY solution. The hallway is a good starting point, where you will be able to acquire some skills. If you have already learnt how to do it, you will be able to move on to the staircase. Ensure that you have the proper tools and sufficient time to do it without a rush.
TOOLS REQUIRED
1. Drill
2. Hammer
3. Pliers
4. Handsaw
5. Sandpaper
6. Tape measure
7. Nails
8. Wood screws
9. Wood glue
STAGE ONE
Clean your stairs, rip off any carpet and get rid of debris. To remove the carpet, use a pair of pliers. Moreover, don’t forget to remove all protruding metal elements, e.g. staples, or to drive them in.
STAGE TWO
If you have already prepared the setting, it will be most convenient to lay laminate flooring by starting at the top of the stairs and moving downwards. This will make it possible for you to avoid stepping on the parts of the stairs where the floor has just been installed. Use a tape measure to precisely measure the width of each stair. Remember that each stair can be of different width, so pay attention to any differences in this respect.
STAGE THREE
Then, you need to cut the tread pieces. To do this you can put the laminate plank across the given step, ensuring that it fits perfectly from left to right and then use a handsaw to cut off the end. The second method is to do it on the basis of the measurement which you took beforehand, if you should find it more practical. Usually, tread widths are longer than a standard laminate size, so you need to cut two sections into pieces that are similar in size, in such a way that their total width equals the overall depth of the given tread. Subsequently, you need to cut the given riser pieces to length. Remember to make sure that they perfectly sit on top of the tread sections below and that those sections are level with the top of the riser in order for the section of the laminate above to lay flat. In the case where any laminate elements do not fit perfectly, you can trim them or sand them down.
STAGE FOUR
Put the first tread elements of laminate in the given place on the top stair. To do so use a large amount of wood glue, applying it in the corners, and squeeze some more out, spreading it in the central part of the stair. Ensure that tongue edge of all laminate sections faces outwards, because it has to meet the stair nosing at a later stage. If you squeeze out too much glue, you need to remove it using a damp cloth.
STAGE FIVE
Use the given section of laminate, which you have cut appropriately before, to cover the riser above the tread which you have just installed. Once more, apply some glue generously and hold the laminate in the given place for up to two minutes so that is can fix in place. You can also nail it instead of gluing.
STAGE SIX
If you have already put the first tread and riser elements in place, add the stair nosing. Nosing is the element that is placed on each riser and slightly overhangs the edge of the given tread step. You need to cut the given laminate sections to proper length – they are frequently provided by the laminate manufacturer to fit. In each tread section, the protruding tongue should be shaped in such a way that a stair nosing element is installed to fit it. To be on the safe side, screw the stair nosing in the given place using several wood screws. Drill pilot holes and then drive each screw to ensure that the laminate doesn’t split.
STAGE SEVEN
Then get to the next stair and do the whole process all over again, proceeding from stage four. Do it till you get to the bottom stair. Ensure that the glue has dried well, before you start using the stairs.


.svg)
| Mon-Fri | 8:00AM – 5:00PM |
| Saturday | 10:00AM – 4:00PM |
| Sunday | 11:00AM – 3:00PM |
.svg)